 치과건강보험
 치과경영칼럼
 법률칼럼
법률칼럼
 직원관리
직원관리
 마케팅
마케팅
A New Sinus Lateral Approach Technique
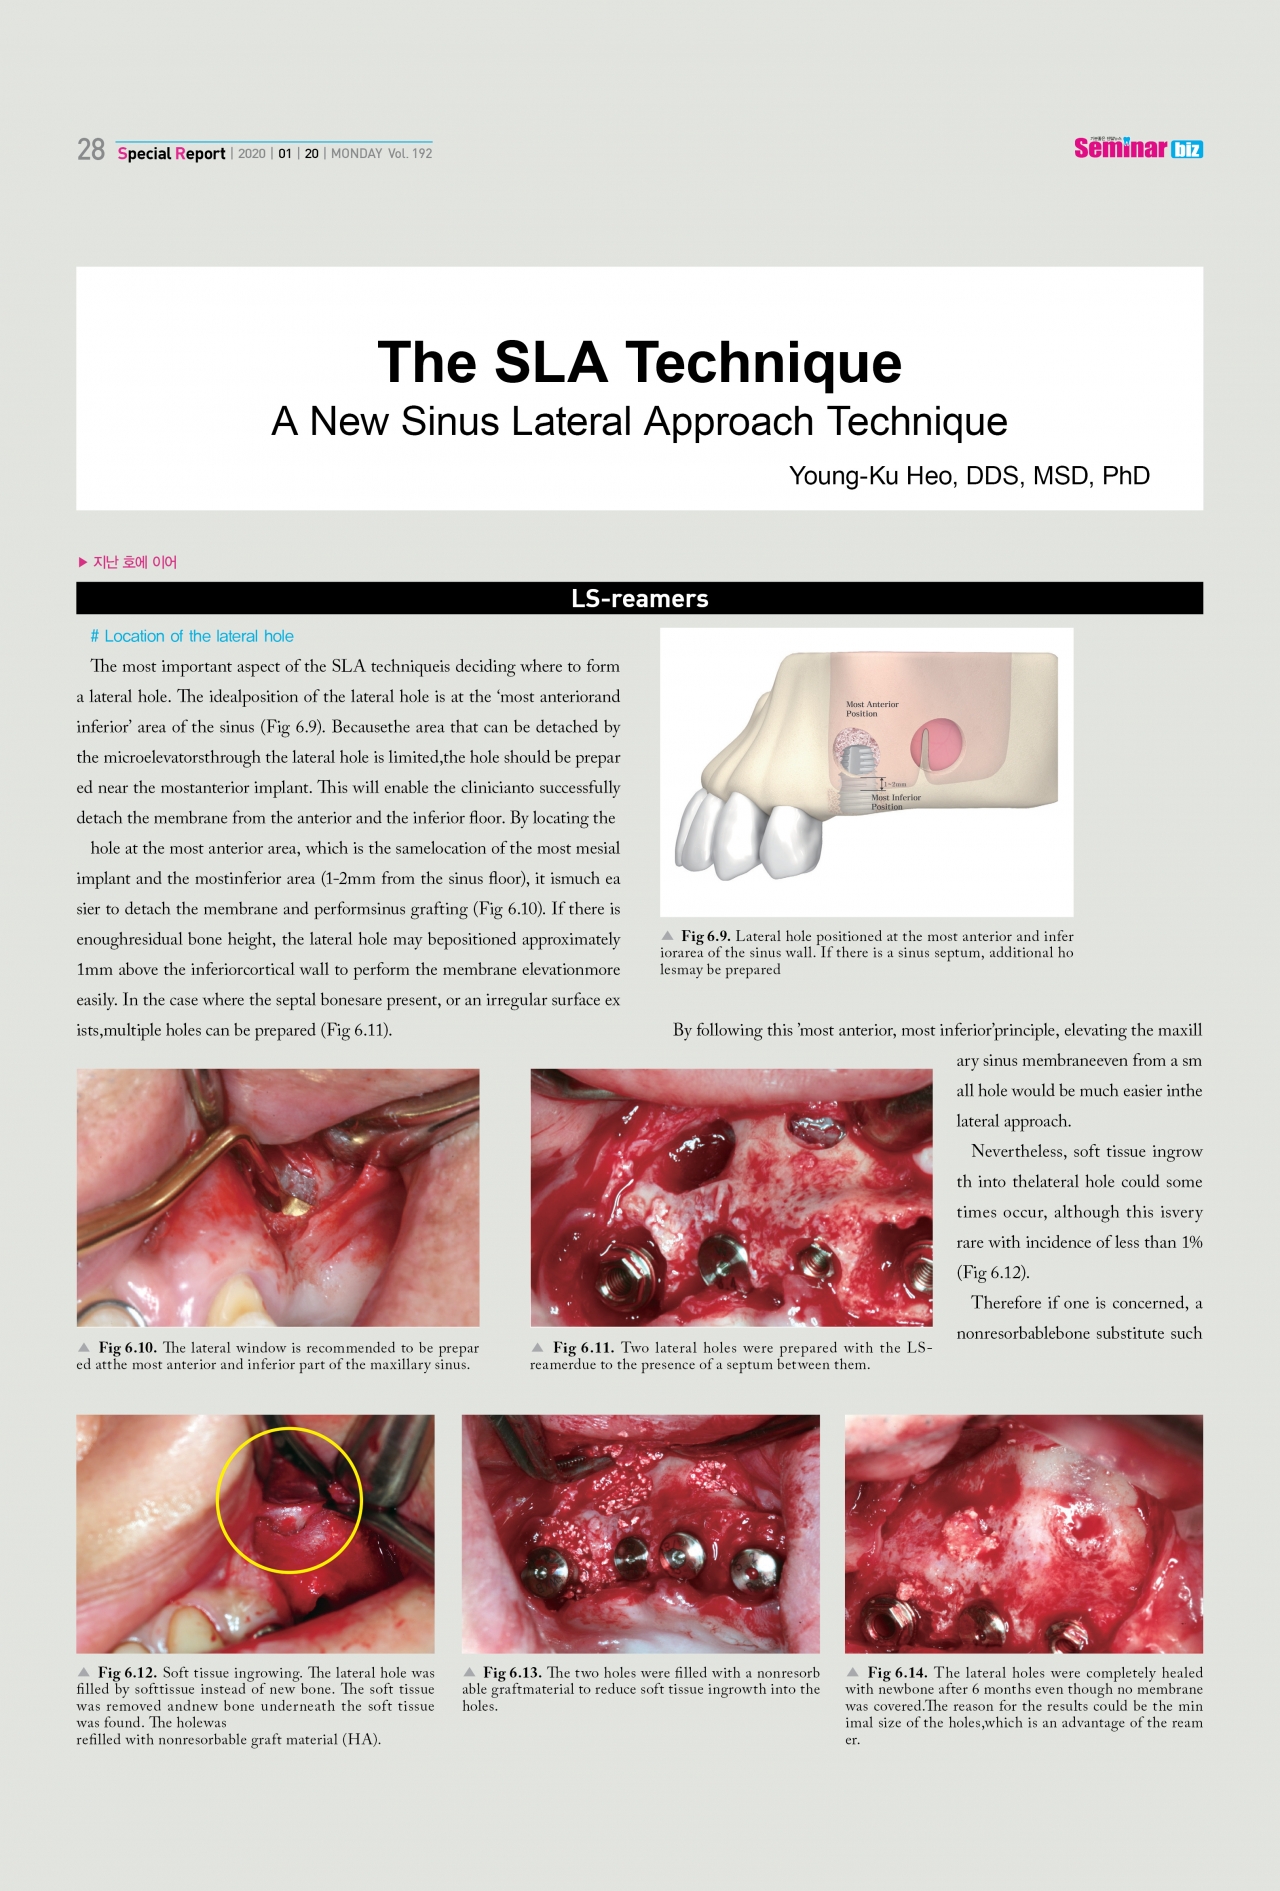
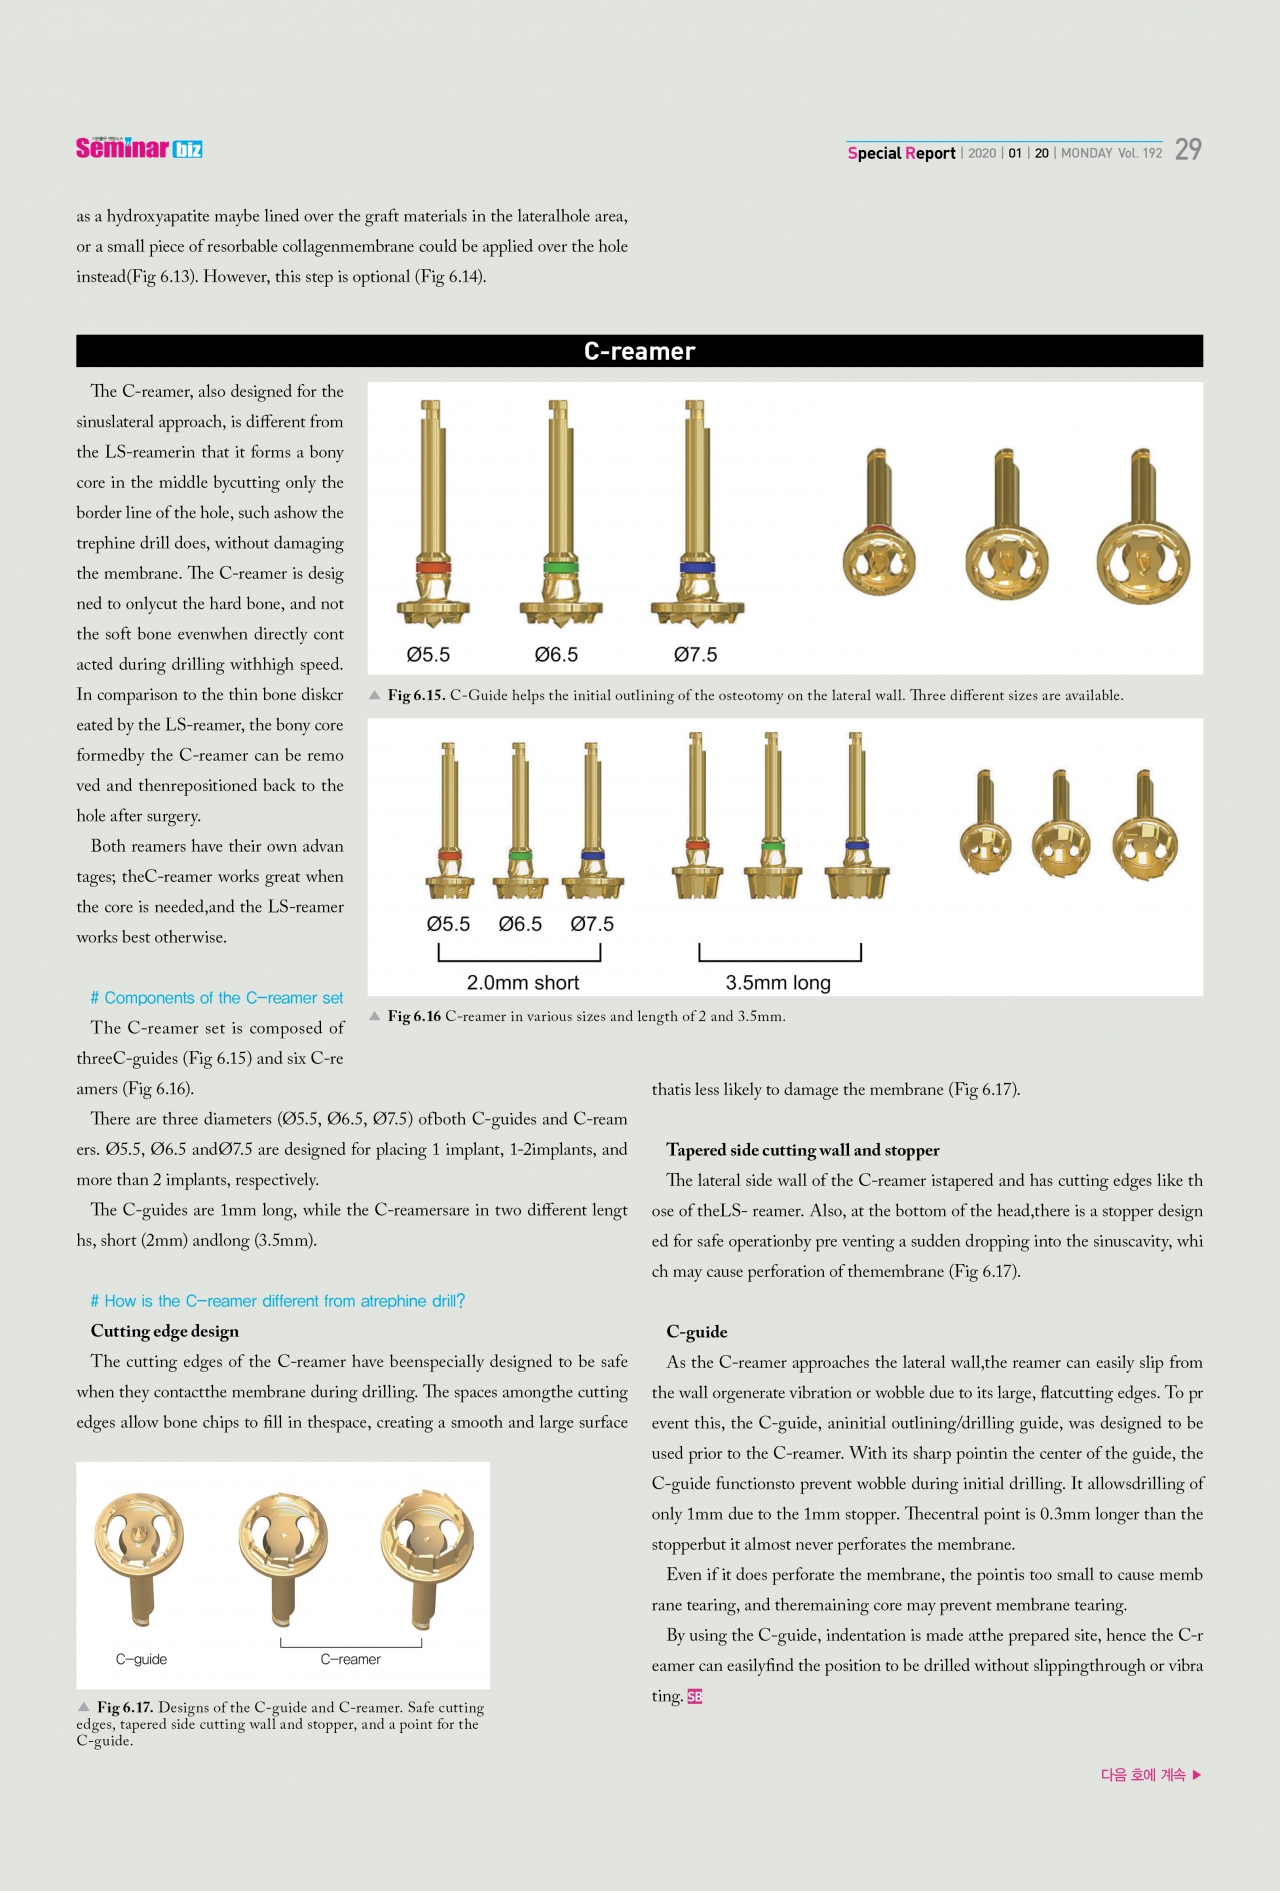
- The SLA Technique
- The SLA Technique
- Crestal and Lateral Sinus Elevation with SCA and SLA Techniques
- Crestal and Lateral Sinus Elevation with SCA and SLA Techniques
- Crestal and Lateral Sinus Elevation with SCA and SLA Techniques
- 6 year Result of Simultaneous Implant Placement after Sinus Elevation through the Crestal Approach with the Microelevators in the Thin Residual Bone Height
- Class III M Fixation with Sinus Crestal Elevation and GBR with a Ti mesh (2)
- Class III M Fixation with Sinus Crestal Elevation and GBR with a Ti mesh
- 7 Year Long-term Result of Immediate Placement with Crestal Sinus Elevation
- Immediate Placement with the Crestal Sinus Elevation in Limited Available Bone Height
- 10mm Sinus Lifting with the SCA Technique in the Severely Concave Sinus Floor
- 10mm Sinus Lifting with the SCA Technique in the Severely Concave Sinus Floor
- 10mm Sinus Lifting with the SCA Technique in the Severely Concave Sinus Floor
- Maxillary Posterior Multiple Teeth Replacement with Class I, II,and III CMI Fixations
- Single Tooth Restoration with a Ti Customized Abutment Supported by an Implant with Class III CMI Fixation in the Maxillary 1st Molar Area
- 8 Year Follow-up Case of Class III CMI/CM Fixation in the Maxillary 1st and 2nd Molar Area
- 8 Year Follow-up Case of Class III CMI/CM Fixation in the Maxillary 1st and 2nd Molar Area
허영구 박사
webmaster@seminarbiz.kr